https://www.microsoft.com/en-us/evalcenter/evaluate-windows-server-2016
Click "Register to continue".
Fill in name, email address, etc., and click Continue.
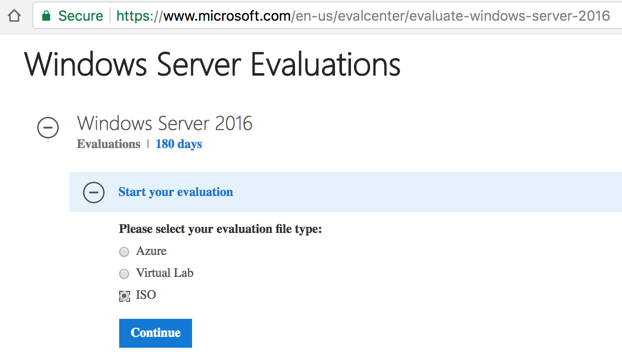
Click ISO, as shown below.
Click Continue.
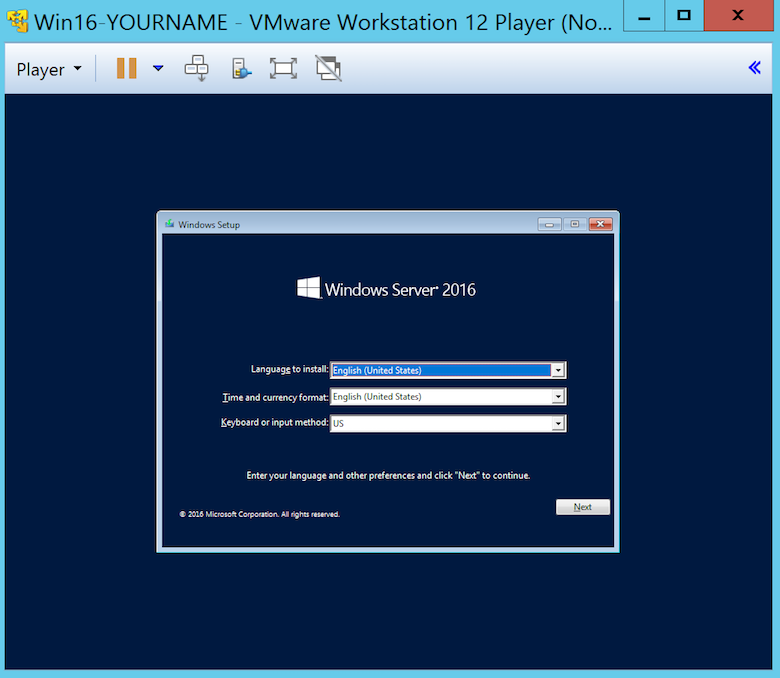
Select English.
It's a 6.5 GB download.
The file name is "Windows_Server_2016_Datacenter_EVAL_en-us_14393_refresh.ISO", as of Dec. 3, 2018. The SHA-256 hash value is:
1ce702a578a3cb1ac3d14873980838590f06d5b7101c5daaccbac9d73f1fb50f
In the "Welcome to the New Virtual Machine Wizard" screen, click the "I will install the operating system later." button, as shown below.
Click Next.

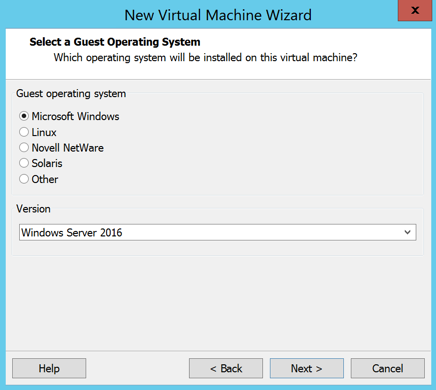
In the "Select a Guest Operating System" box, select "Microsoft Windows" and "Windows Server 2016", as shown below.
Click Next.
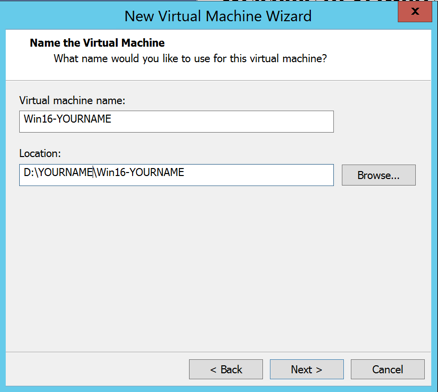
In the "Name the Virtual Machine" box, enter a Virtual machine name of Win16-YOURNAME, replacing "YOURNAME" with your own name, as shown below.
Click the Browse... button and navigate to the VMs drive and the folder with your name on it.
DO NOT SAVE VIRTUAL MACHINES ON THE C: DRIVE IN S214
Click Next.
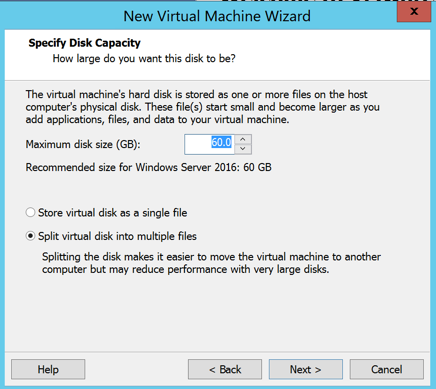
In the "Specify Disk Capacity" box, accept the default options, as shown below, and click Next.
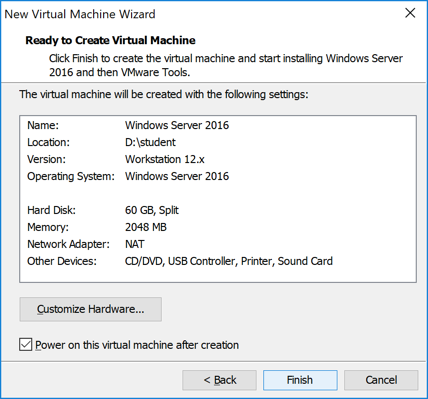
In the "Ready to Create Virtual Machine" box, click the "Customize Hardware..." button, as shown below.
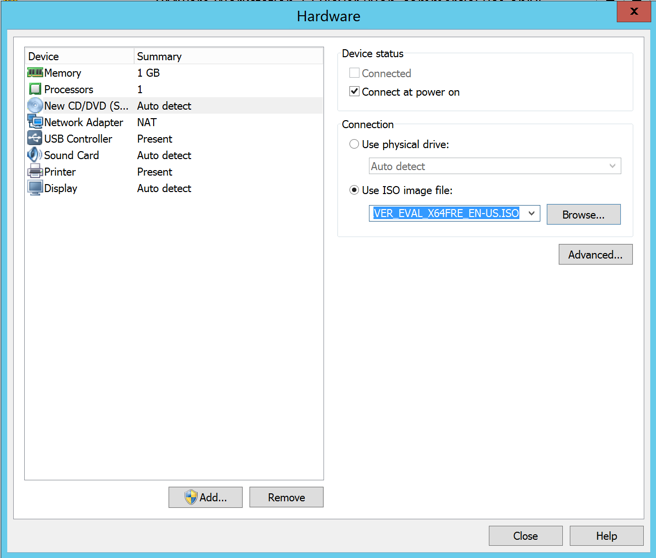
In the "Hardware" box, on the left side, click "New CD/DVD". On the right side, click the "Use ISO image file" button.
Click the Browse... button. Navigate to your Downloads folder and double-click the 4393.0.161119-1705.RS1_REFRESH_SERVER_EVAL_X64FRE_EN-US.ISO file, as shown below.
Click the Close button.
In the "Ready to Create Virtual Machine" box, click the Finish button.
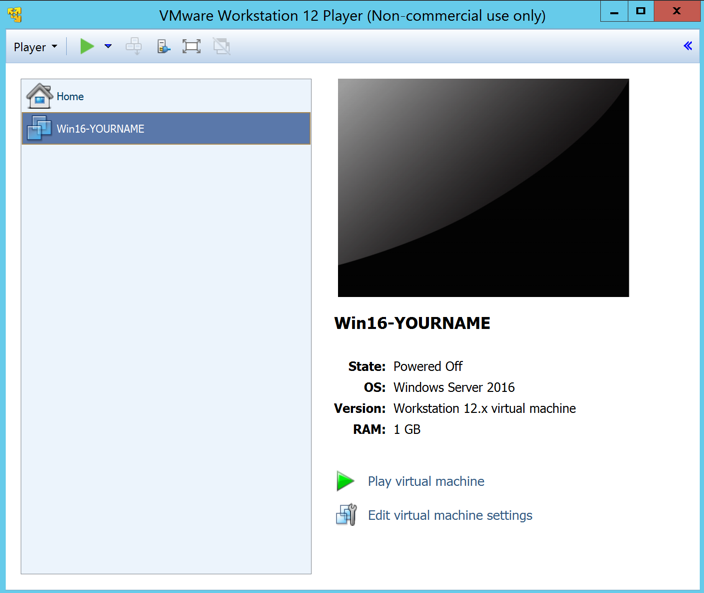
VMware Workstation Player now shows a "Win16-YOURNAME" item on the left side, as shown below.
On the right side, click "Play virtual machine".
If a box pops up titled "Software Updates", click "Remind Me Later".
If a box pops up titled "Removable Devices", click OK.
A "Windows Setup" box appears, as shown below.
Click Next.
On the next screen, click the "Install now" button.
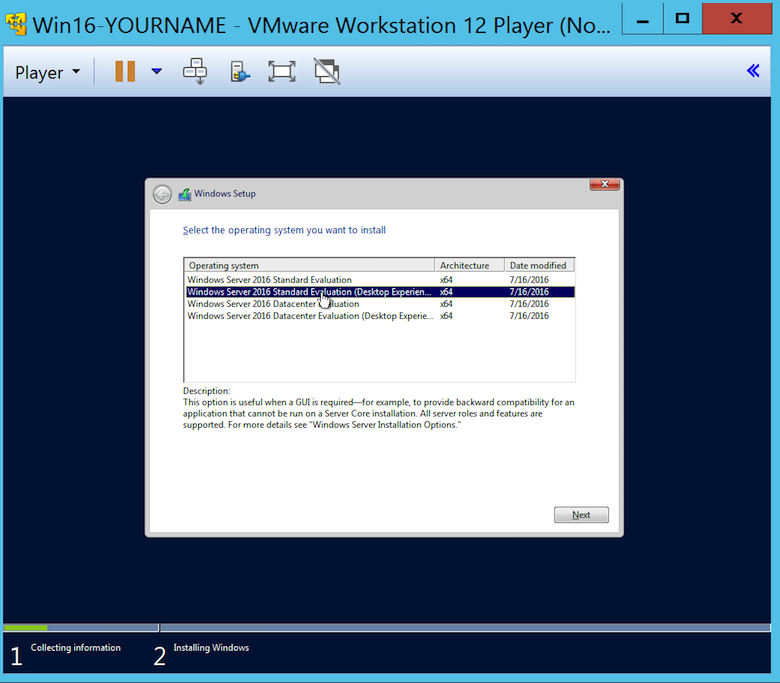
In the "Select the operating system you want to install" box, click "Windows Server 2016 Standard Evaluation (Desktop Experience)", as shown below.
Click Next.
On the next screen, click the "I accept the license terms" box, and click Next.
On the next screen, click "Custom: Install Windows only (Advanced)" box.
In the "Where do you want to install Windows" box, click Next.
Wait a few minutes while Windows installs.
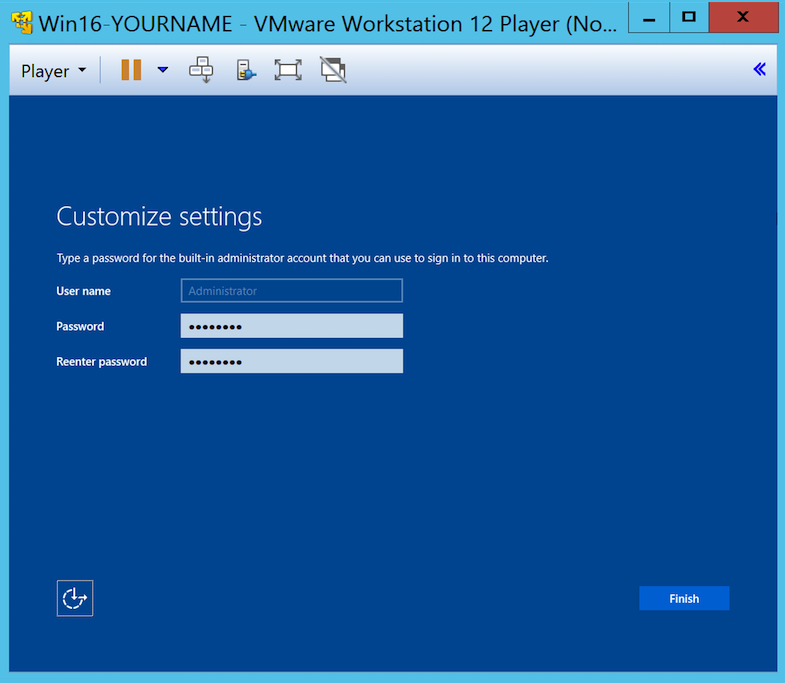
Your virtual machine restarts twice, and you see the box shown below.
Enter these values:
Windows starts, as shown below.
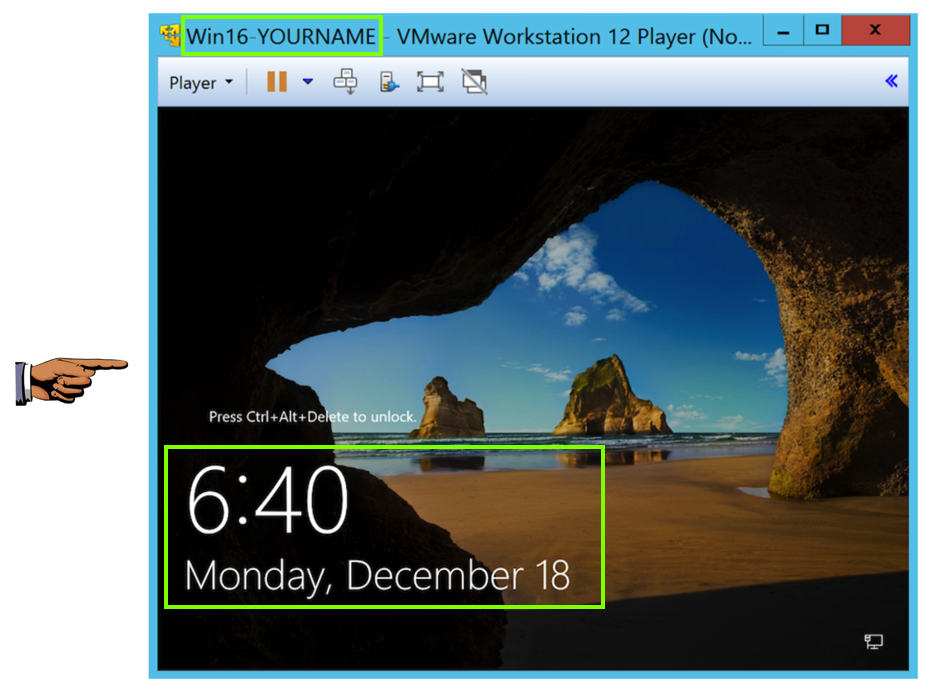
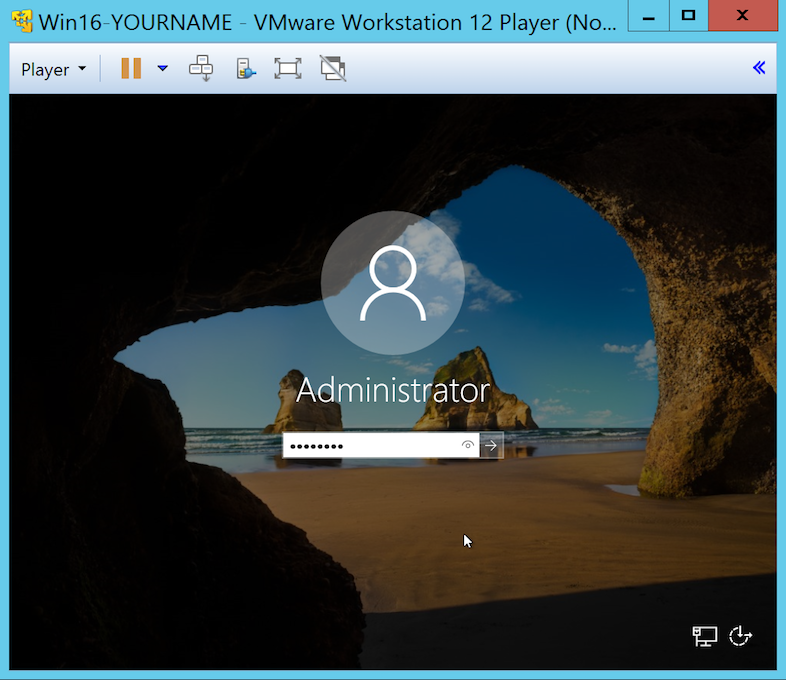
At the login screen, enter a password of P@ssw0rd as shown below. Then press Enter.
Adjusting Resolution
If the text in the virtual machine is tiny, and hard to read, do these steps:Then restart VMware Workstation Player and run your VM again. The font should be larger.
- At the top right of the VMware Workstation Player window, click the red X.
- A box pops up. Click Suspend button.
- On your desktop, right-click the "VMware Workstation Player" icon and click Properties.
- In the "VMware Workstation Player Properties" box, on the Compatibility" tab, click the "Disable display scaling on high DPI settings" box.
- Click OK.
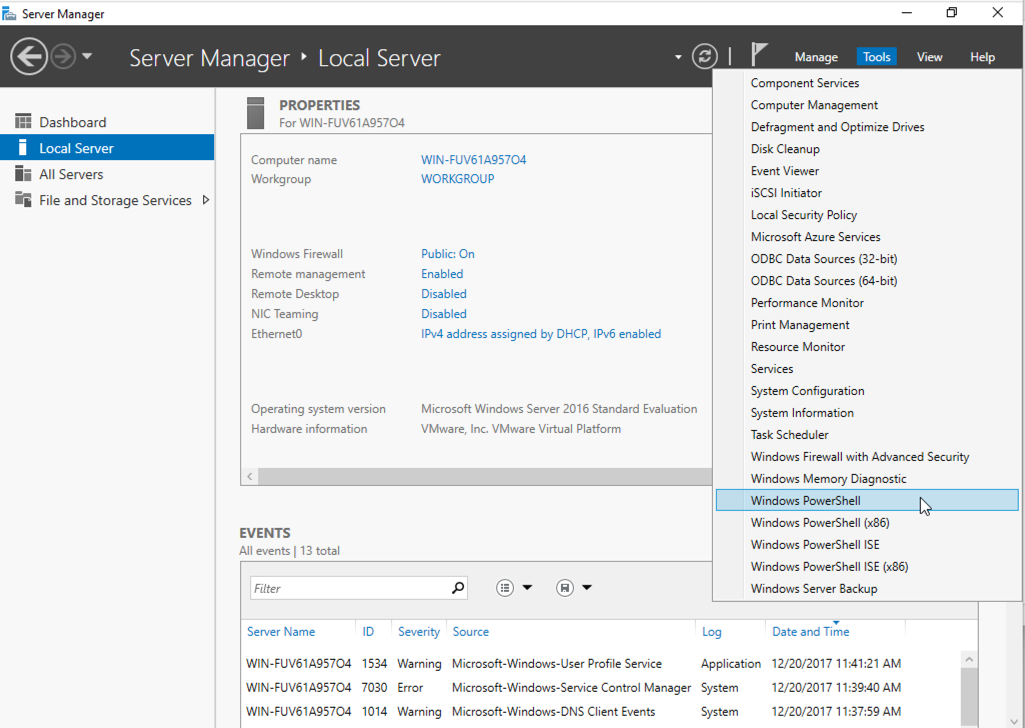
On your Windows Server 2016 desktop, in Server Manager, on the top right, click Tools, "Windows PowerShell", as shown below.
In PowerShell, execute this command:
sconfig
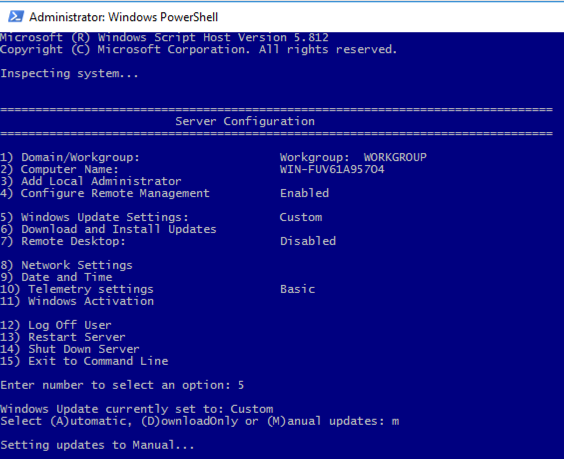
After a minute or two, an "Update Settings" box pops up. Click OK.
We want to allow that, so do these steps:
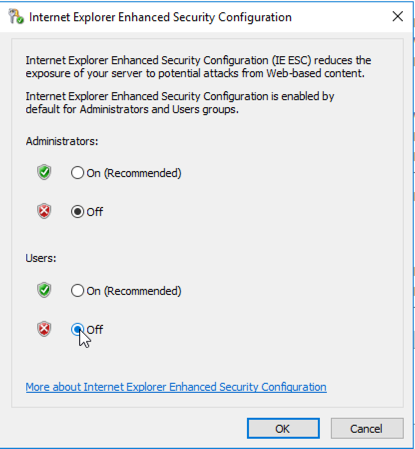
In Server Manager, on right side, find "IE Enhanced Security Configuration". Click the word On next to it, as shown below.
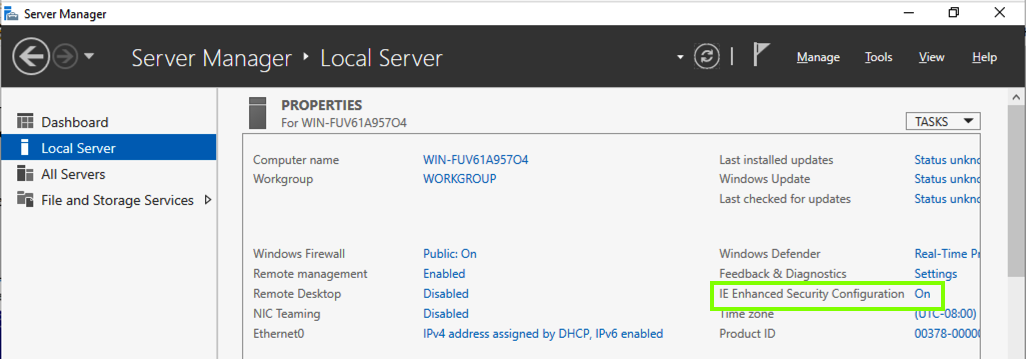
In the "Internet Explorer Enhanced Security Configuration" box, click both Off buttons, as shown below.
Click OK.
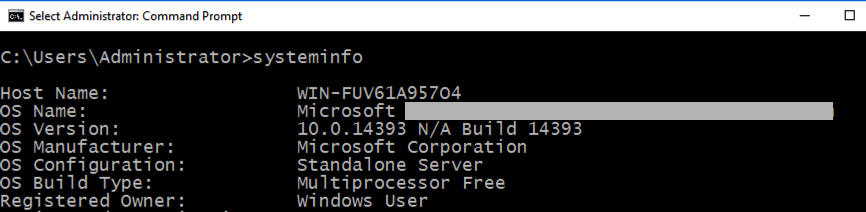
systeminfo
slmgr -dlv
slmgr -rearm