ED 301: Windows Stack Protection I: Assembly Code (15 pts)
What You Need
A Windows 10 or 2016 Server machine, real or virtual. You cannot use Windows Server 2008.
Purpose
You will write a small C program and compile it with
and without stack protection. You'll examine the
executable using IDA Pro and see the code that implements
the stack cookie.
Downloading and Installing Visual C++ Build Tools
Note
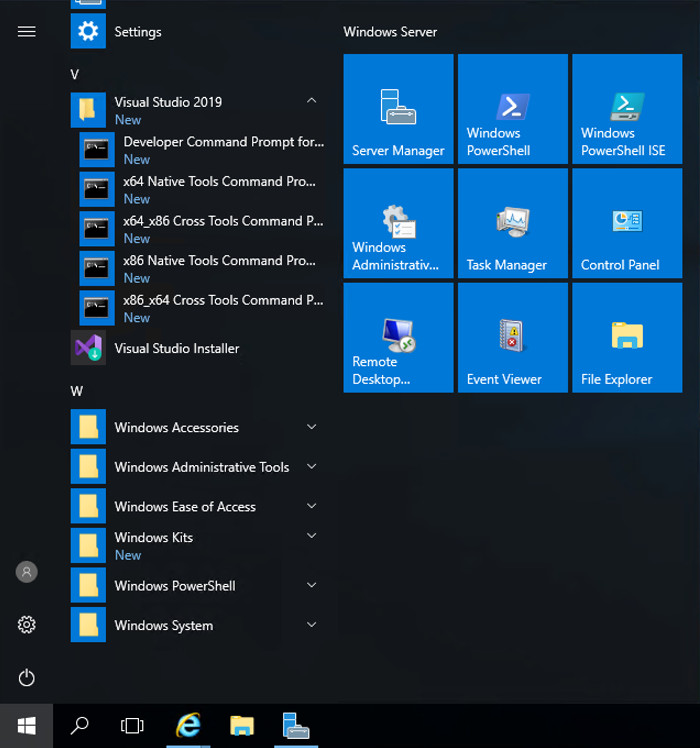
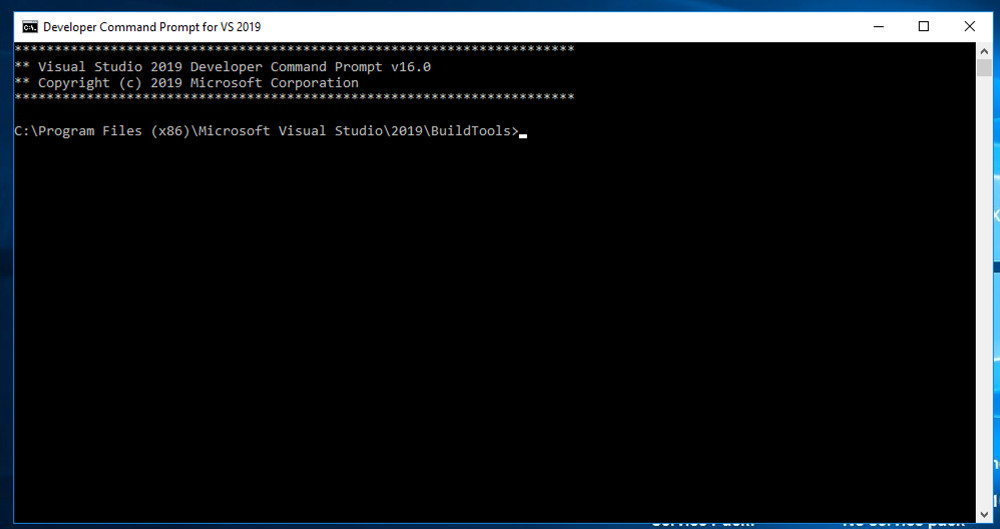
If you already have Visual C++ Build Tools installed, click
the Start button, scroll to the V section,
expand "Visual Studio 2019", and click
"Developer Command Prompt for VS 2019",
as shown below.
Then skip to the
"Making the pwd Program in C++"
section, below on this page.
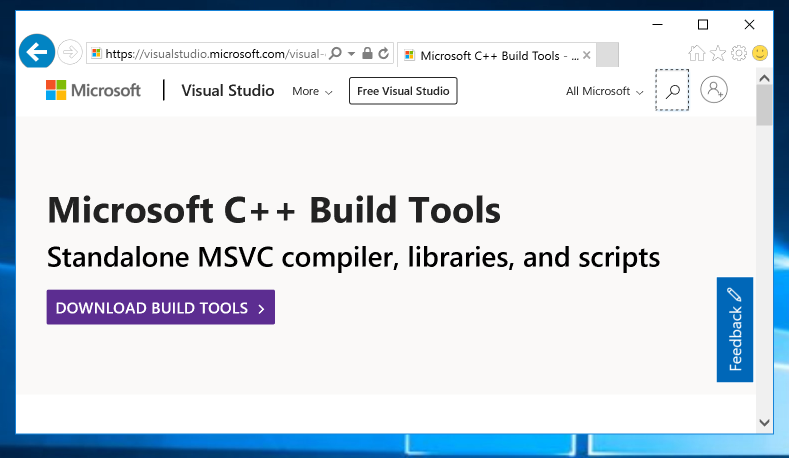
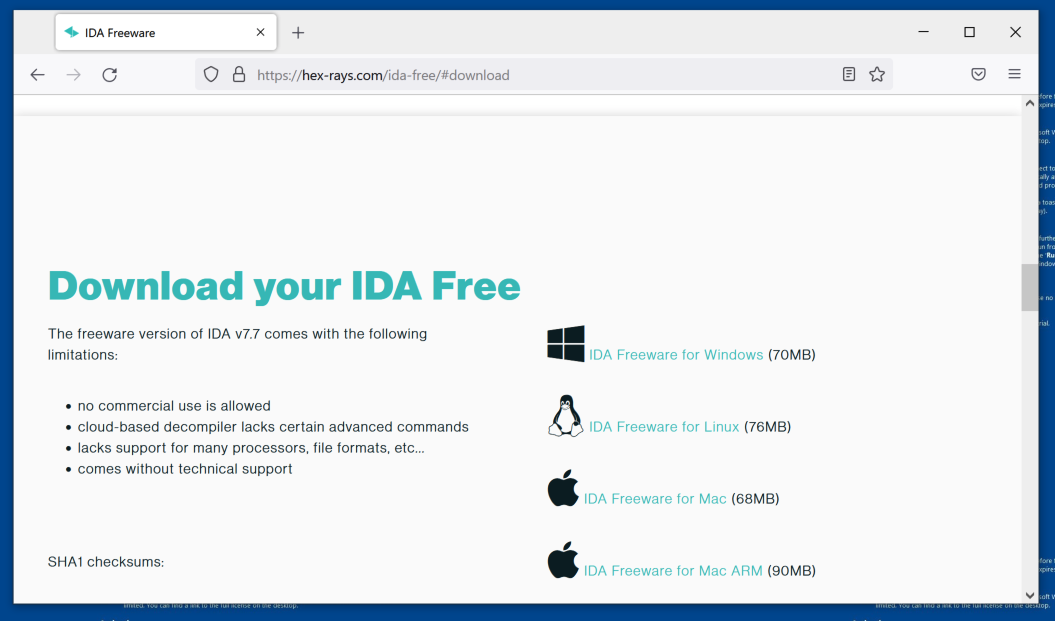
Click the "Download Build Tools" button,
as shown below.
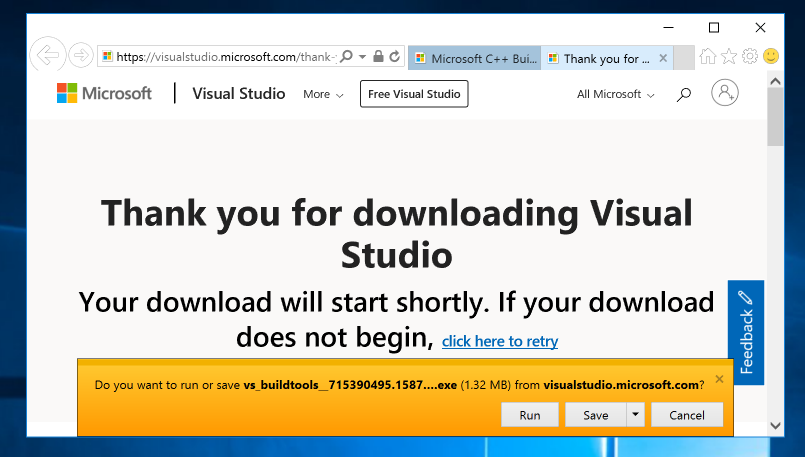
A download dialog appears, as shown below.
Click Save. After the download completes,
click Run.
If a User Account Control box pops up,
click Yes.
Click Continue.
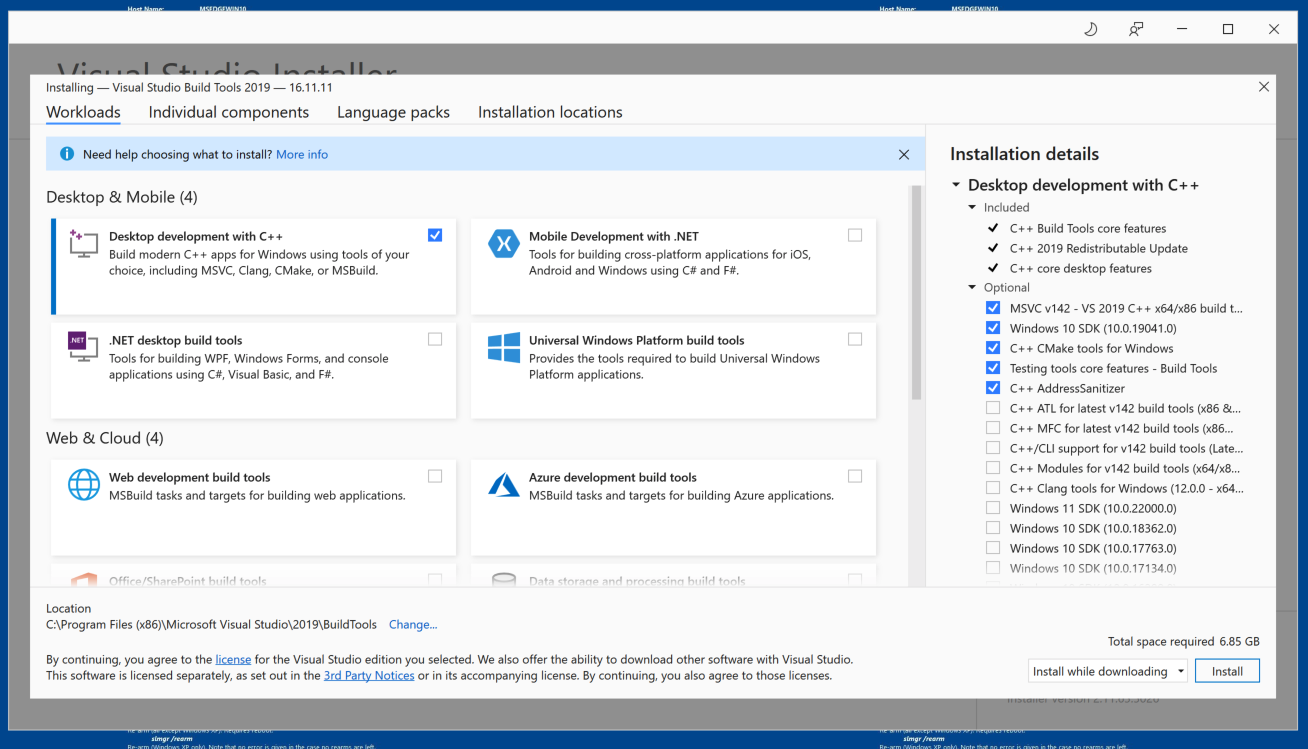
A large window appears,
as shown below.
At the top left,
check "Desktop development with C++".
At the bottom right,
click the Install button.
Wait while software downloads and installs.
Click the Windows Start icon in the bottom left corner,
and scroll to the V section.
Expand the "Visual Studio 2019" section
and click Developer Command Prompt for VS 2019
A Developer Command Prompt window opens,
as shown below.
Tip
The easiest way to proceed is to open these instructions
in Internet Explorer inside the Windows
machine. That way it's easy to copy and paste
code.
Making the pwd Program in C++
In the Developer Command Prompt window,
execute these commands:
mkdir c:\127
cd c:\127
notepad pwd.cpp
A box pops up, asking
"Do you want to create a new file?".
Click Yes.
Enter this code,
as shown below:
#include <iostream>
using namespace std;

int test_pw()
{
        char pin[10];
        int x=15, i;
        cout << "Enter password: ";
        cin >> pin;
        for (i=0; i<10; i+=2) x = (x & pin[i]) | pin[i+1];
        if (x == 48) return 0;
        else return 1;
}


void main()
{
        if (test_pw()) printf("Fail!\n");
        else printf("You win!\n");
}
In Notepad, click File,
Save.
In the Developer Command Prompt window,
execute these commands:
Two versions of the program are produced.
The "pwd.exe" program has stack protections, but
"pwdn.exe" does not, so it's slightly smaller,
as shown below.
Download and install the Windows version,
as shown below.
Viewing pwd.exe in IDA
Double-click the
"IDA Freeware"
shortcut on your desktop.
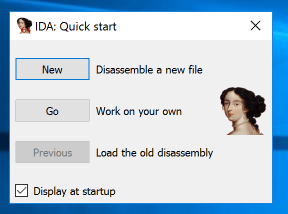
Click "I Agree".
In the "IDA: Quick start" box,
click New,
as shown below.
Navigate to the
C:\127\pwd.exe file and
double-click it.
In the "Load a new file" box, click
OK.
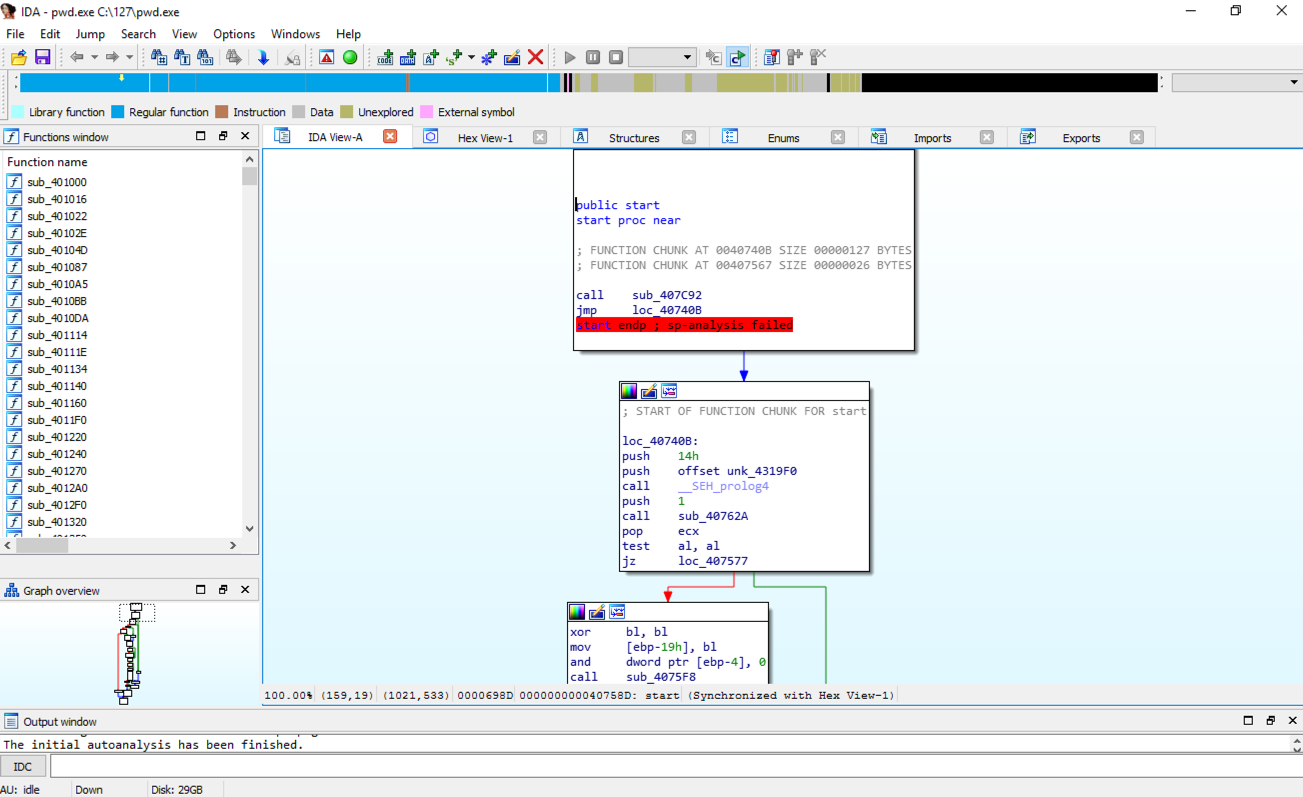
IDA opens, showing some assembly
code,
as shown below.
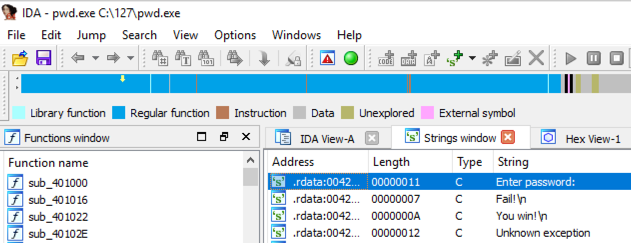
From the IDA menu, click
View, "Open subviews", "Strings".
Double-click "Enter password",
as shown below.
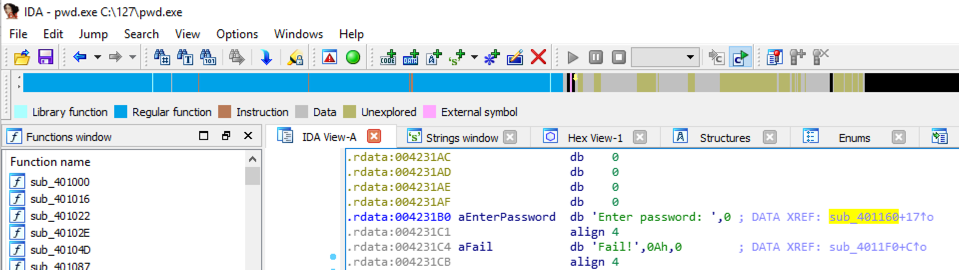
The .rdata section appears, showing stored
strings. On the line containing
"Enter password", find "DATA XREF".
Point to the address after the
"DATA XREF" marker, as highlighted in
yellow in the image below, and double-click it.
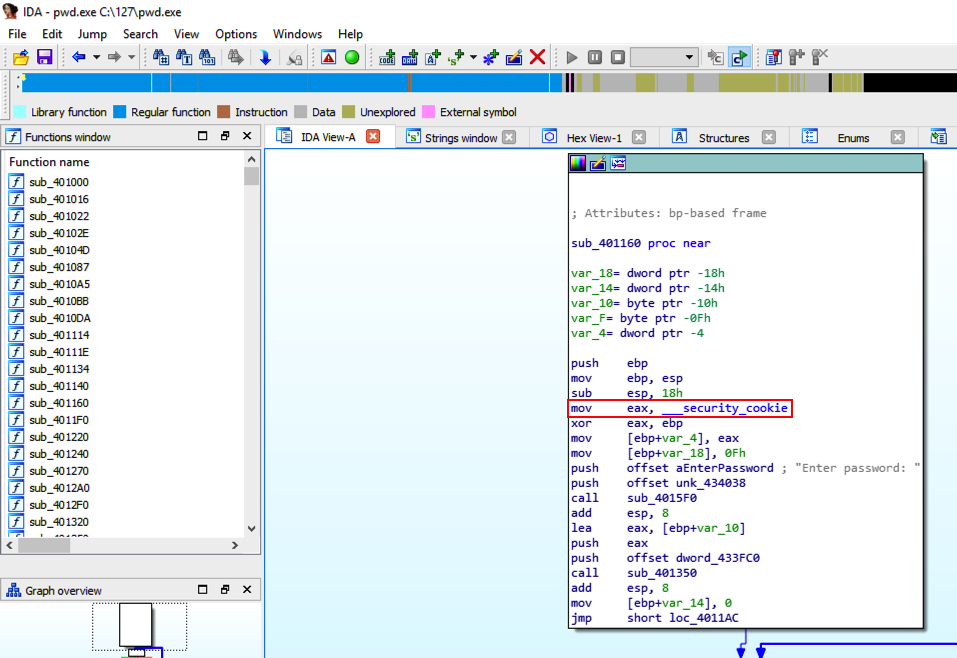
The function prologue appears,
with a line containing "security_cookie",
as shown below.
Viewing pwdn.exe in IDA
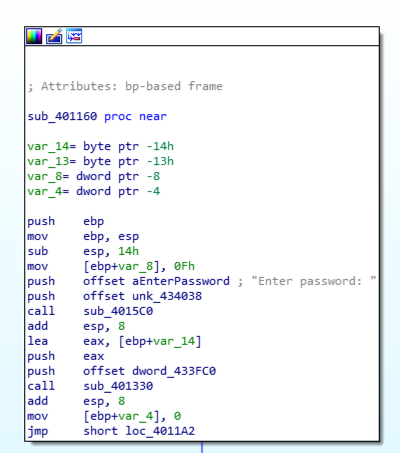
Repeat the process ( File / Open / pwdn.exe ) to see the prologue for
pwdn.exe.
In the "Save database" pop up box, click
"DON'T SAVE the database" and click
OK.
View the strings and follow the "DATA XREF"
market to see the function that asks for
the password again.
The "security_cookie" line is gone,
as shown below.
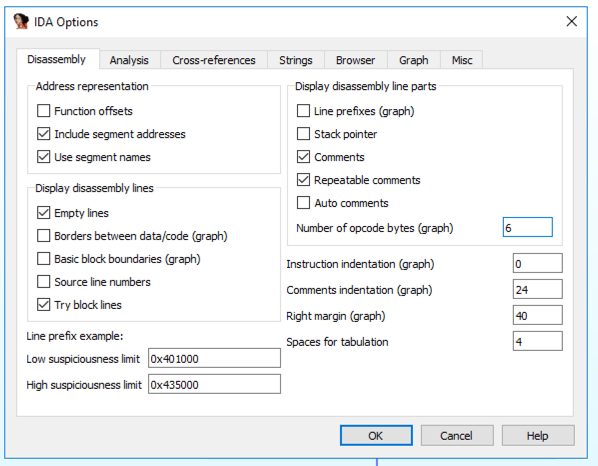
Making Opcode Bytes Visible
From the IDA menu, click Options,
General.
Enter a "Number of opcode bytes" of 6
as shown below. Then click OK.
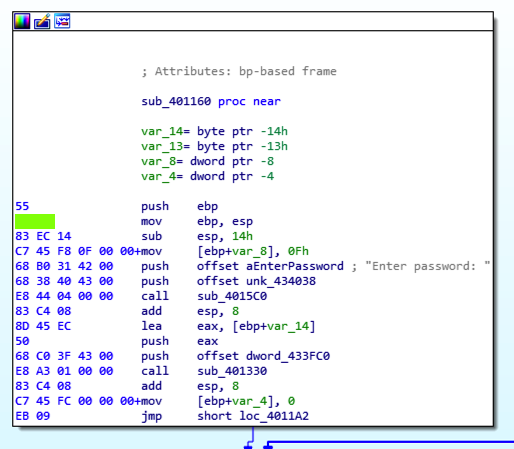
ED 301.1: Viewing Opcode Bytes (15 pts)
Find the hexadecimal values covered by a green
box in the image below. That's the flag.
Ported to Google Cloud by Travis Knapp-Prasek
Minor edits 8-2-19
Installation item name change note added 10-16-19
Visual Studio and IDA installation steps updated 4-18-2020
Updated for Windows 10 3-14-22
Video added 3-22-23